WORKING WITH PROJECTS
Creating a New Project
Before you start your contract administration with FIVE, you must create a new project.
When you create a new project, you will be able to define project-specific information, and optionally import data from previous jobs to save time on repeat data entry.
To create a new project:
Click the FIVE menu button, then click
 New Project. The New Project Wizard window appears:
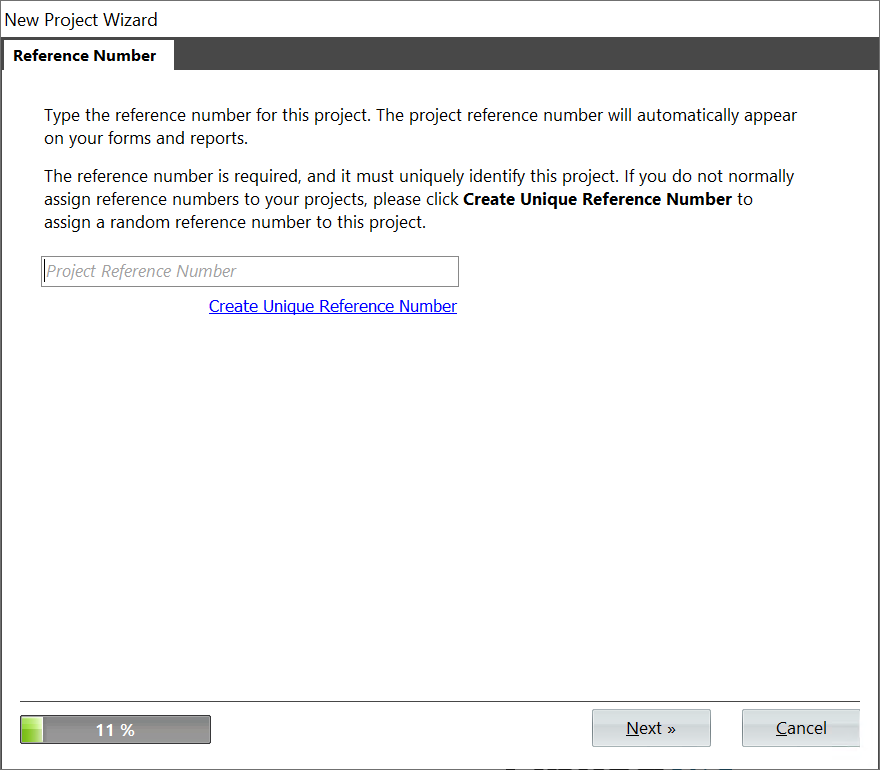
Figure 8 The New Project Wizard will guide you through the process of starting a new project in FIVE.
In the Project Reference Number box, type a unique reference number for the project, and then click Next.
Tip
Reference numbers are your internal unique identification codes for your projects. They are sometimes called job numbers or project numbers.
Reference numbers can include any combination of numbers, letters, and symbols but must be unique. FIVE will alert you if you try to re-use a reference number.
In the Project Title box, type a unique title for the project, and then click Next.
Tip
Titles are a short descriptive identifier for your project. Choose something that will make your project easy to find when searching for it later.
Project titles can include any combination of letters, numbers, and symbols, but must be unique – FIVE will alert you if you try to re-use a project title.
In the Project Category box, type or select a category for this project and then click Next. If this is the first time you are using a category, you will be prompted to confirm that you want to add it to the list of available categories.
Tip
Project categories can be anything that will help you group and identify projects more easily. The choice of what categories to use are an internal decision and will be based on the types of projects you work on. Many users use short tags for categories like “Commercial”, “Institutional”, “Condo”, etc…
Every time you create a new category, it will be available in the list for quick and easy selection the next time you start a new project.
In the Contract Type box, type or select the contract type of the project, and then click Next. If this is the first time you are using a contract type, you will be prompted to confirm that you want to add it to the list of available contract types.
Tip
Contract types can be any text that will help you group and identify projects more easily. Typical types include “CCDC2”, “Design Build”, “Contract Management”, etc…
If you want to import data from another project such as form types and templates, project percentages, and/or work divisions, then click the
 button, select the source project from the list that appears, and then click Next.
If you do not want to import anything from another project, click Next and skip to step #8
On the Import Options page, select the information that you would like to be imported into the new project, and then click Next.
The import options include:
Form Types and Templates All form types and their associated template files. For example, SI, CO, CFP, etc…
Note
This option only imports the types and templates, not the individually logged items of each type.
Column List Entries Re-usable entries for lists such as Reason and Status. Company Logo The image file of your company or project logo Project Percentages Percentages like Tax % and Legislated Holdback % Divisions The list of available work/breakdown divisions for use on the Contracts tab. This can be the 5-digit MasterFormat 1995, 6-digit MasterFormat 2014+, or a custom division list. Localization Settings Regional settings for date formatting, currency formatting, etc… Project Contacts Links for the primary contacts to your global address book. Primary contacts include the Owner, Builder, Designer, and Contract Administrator.
Note
Since the address book is a shared resource, this option will simply link to existing contacts in the address book.
Budgets Logged items from the Budgets tab. Choosing this option can help you save time on data-entry when you share similar budgets between projects.
Note
Dollar values and other project-specific data won’t be imported, but common/descriptive information like numbers, dates, and titles will be imported.
Contracts Logged items from the Contracts tab. Choosing this option can help you save time on data-entry when you share similar work breakdowns between projects.
Note
Dollar values and other project-specific data won’t be imported, but common/descriptive information live division and reference numbers, and titles will be imported.
Submittal Items Logged items from the Submittal Items tab. Choosing this option can help you save time on data-entry when you share similar shop drawing lists between projects.
Note
Review status and other project-specific data won’t be imported, but common/descriptive information like titles will be imported.
On the Review and Confirm page, review the options and settings you have chosen and then click Create. FIVE will take a minute to setup your project, and import information from another project if you’ve chosen that option.
Once your new project has been created, you will be taken to the Details Page page on the PROJECT HOMEPAGE TAB tab where you can configure shared settings for the project (such as tax and holdback percentages, contacts, etc…).
Opening an Existing Project
To continue working on an existing project, you must first open it. To do this:
Click the FIVE menu button, and then click
Open Project. The Project List window appears: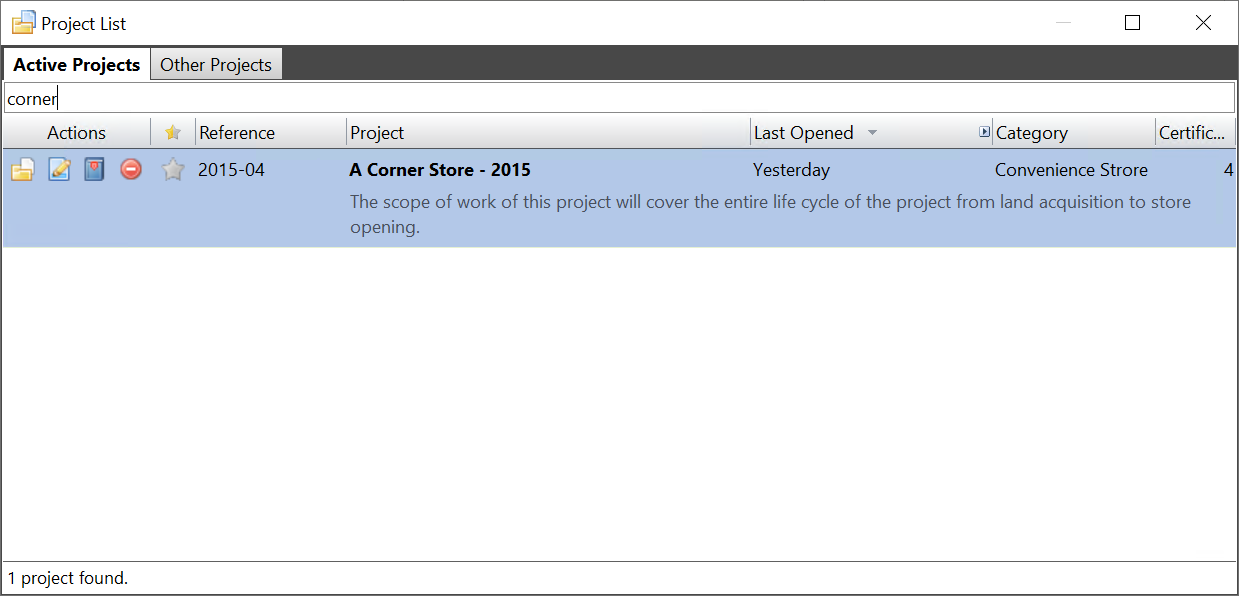
Figure 9 The Project List window with a filter applied on the keyword “corner”
Double-click a project to open it.
Tip
If you are working on a lot of projects, you can quickly find a specific project by typing the project reference number or a keyword from the title into the Search for Projects box. The project list will be filtered to show only projects that match the search criteria.
Can’t find the project you are looking for?
Your user account may not have permission to see the project. Please contact your FIVE system administrator for permission to access the project.
It’s also possible that the project has been marked archived or deleted. See the Opening an Archived or Deleted Project section for more information.
Opening an Archived or Deleted Project
Projects can be marked as Archived (read-only), or Deleted (marked for permanent deletion at a later time). Archived and Deleted projects do not appear in the main project list, but are still accessible. To open an archived or deleted project:
Click the FIVE menu button, and then click
Open Project. The Project List window appears.Click the Other Projects tab.
If you see the project in the list, then it has been archived. You can double-click an archived project to open it in Reviewer/Read-only mode.
Tip
If you want to edit an archived project, you must first click
 Reactivate this project in the Actions cell on the archived project row. The reactivated project will appear on the Active Projects tab where you can double-click it to open it.
If the project is not in the list, then it may have been marked deleted. Select the Show projects marked for deletion option (near the bottom of the project list window). All projects that have been marked for deletion will appear, and you can restore any project by clicking
 Restore this project in the Actions cell on the deleted project row. The restored project will appear on the Active Projects tab, where you can double-click it to open it.