CORE TAB FUNCTIONS
Introduction
FIVE’s core functions are common to many parts of the software. It is important to get familiar with these functions, as you will be using them frequently to perform your contract administration work in FIVE.
Reports
Overview
FIVE’s reports are a cross between a spreadsheet and a database, with unique features that make contract administration easier and more effcient.
The bulk of your data entry will be done in reports, where you log items such as Site Instructions, Field Reviews, Change Orders and more. All reports are organized into tabs in the bar that runs along the top of the screen, from Budgets through Sketches. See the TAB OVERVIEW section for the full list of tabs and associated documents.
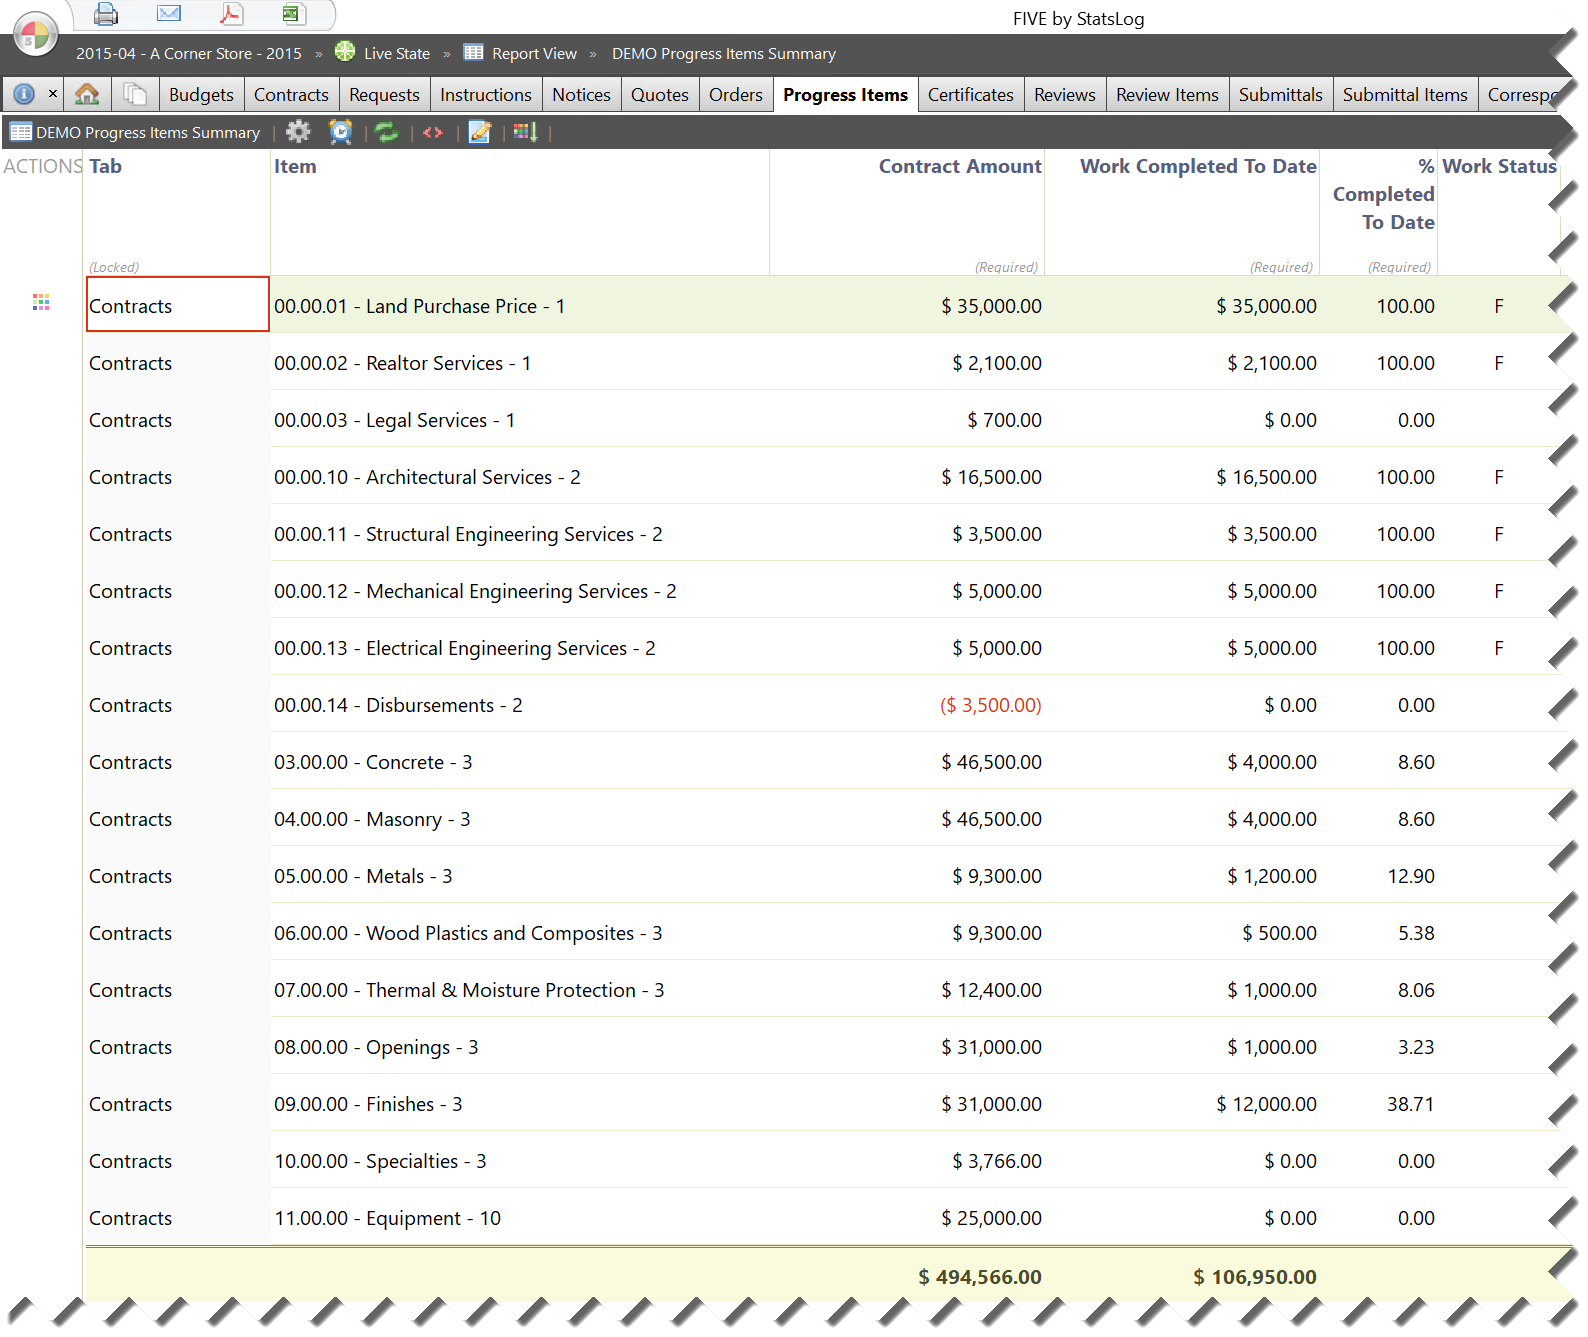
Figure 11 An example Progress/Schedule of Values report
Click any tab from Budgets through Sketches to get to a report associated with the selected tab.

Figure 12 Switch report types by clicking tabs.
More Information
Reports are a broad topic, outside the scope of this documentation. We highly recommend you read the FIVE Report Guide to learn all about reports.
Forms
Overview
FIVE’s forms are like word processor documents that are linked to a database. Forms are template based, and they include a host of features that make contract administration easier and more efficient.
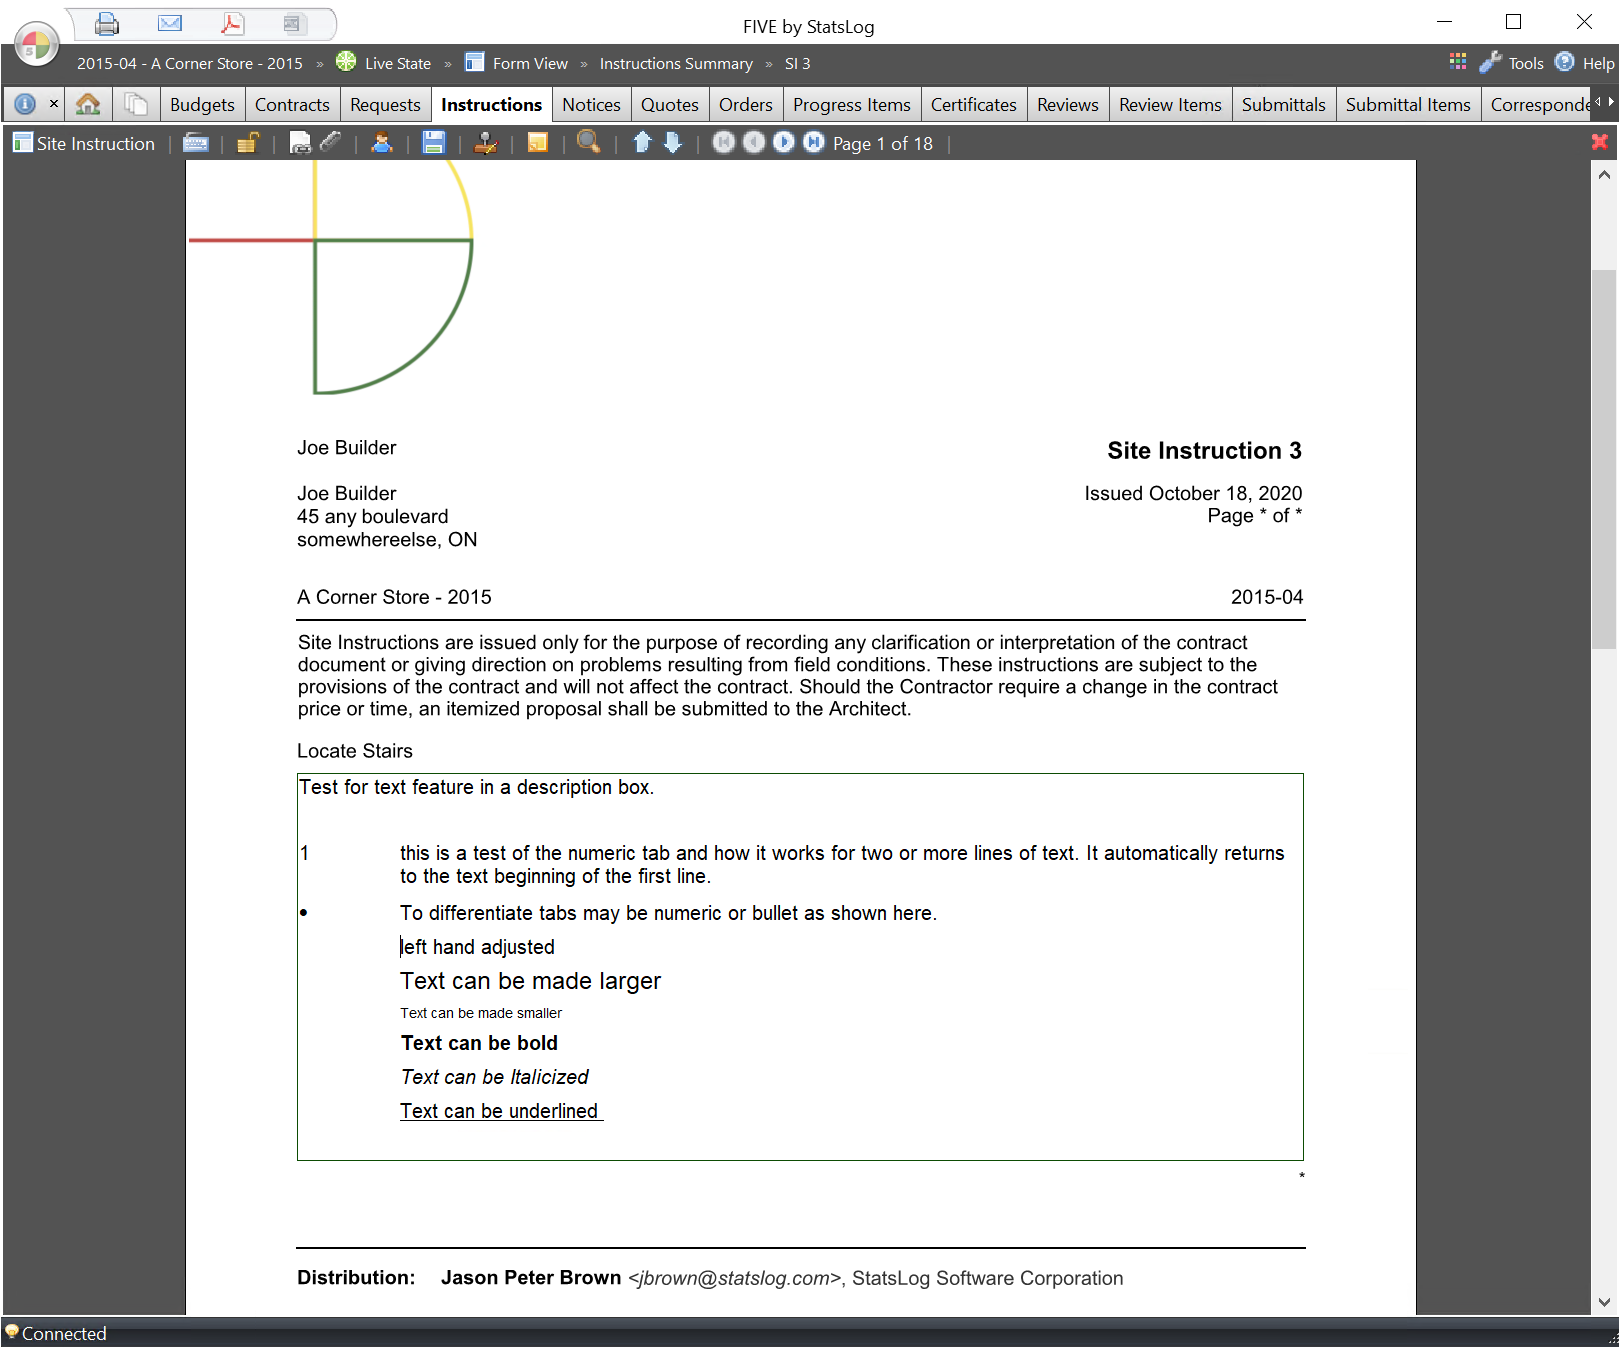
Figure 13 An example Site Instruction (SI) Form.
Every form is directly linked to a report row, meaning that information and updates are shared automatically between them. This dramatically reduces the amount of typing required, and virtually eliminates the chance of errors and omissions.
You can go to Form view for any report row that supports it by selecting the row, then click the ![]() button in the Actions cell. You can leave form view and return to the report by clicking the
button in the Actions cell. You can leave form view and return to the report by clicking the ![]() button at the top-right corner of the form view area.
button at the top-right corner of the form view area.
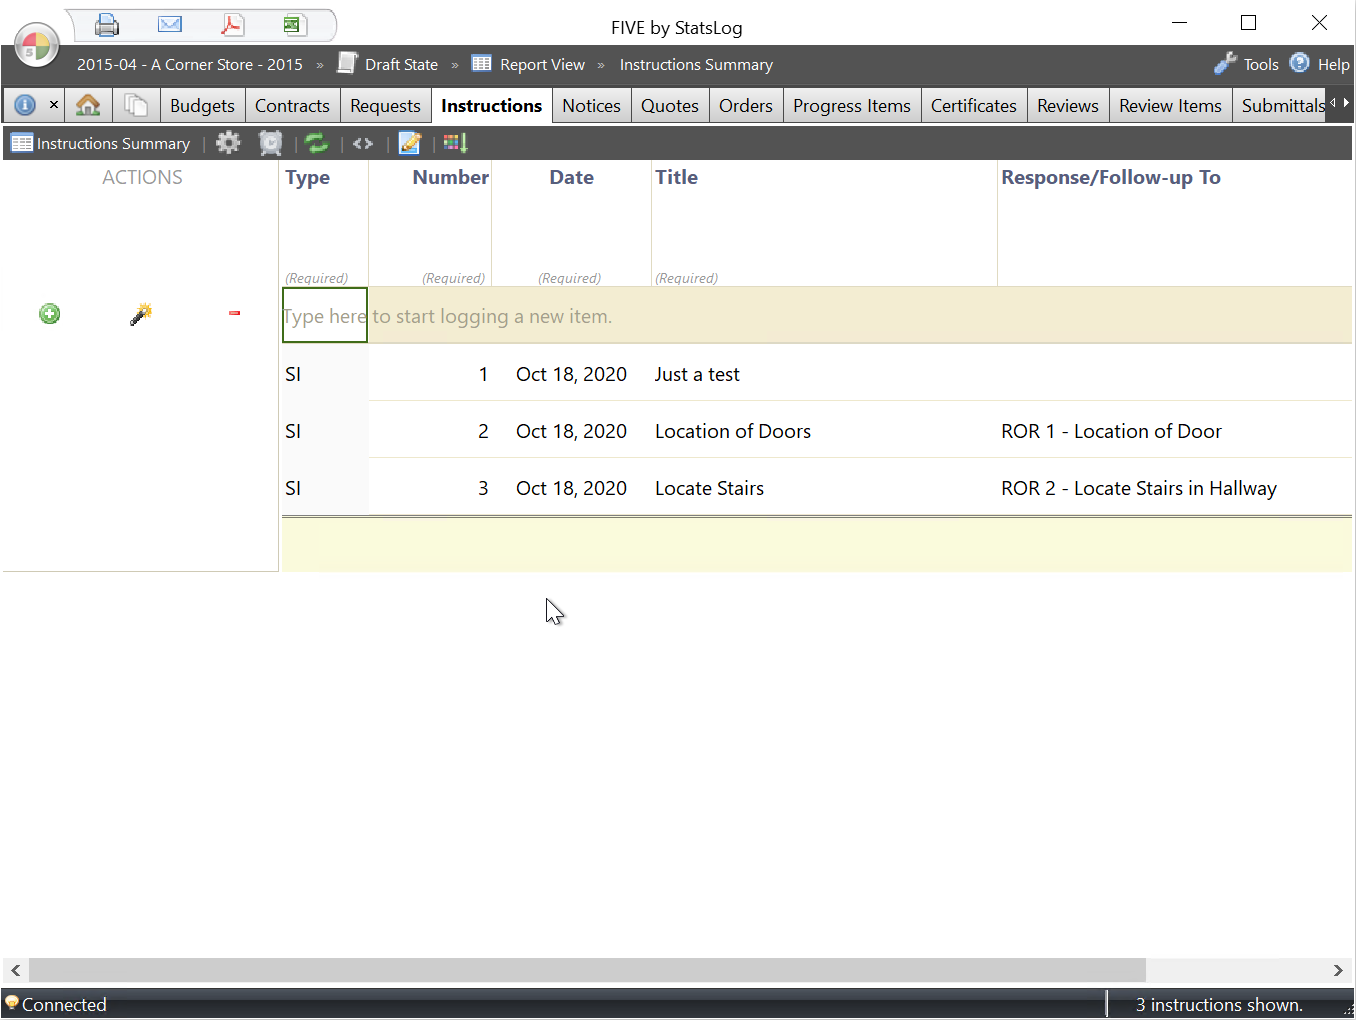
Figure 14 Show any item’s form by clicking the ![]() icon in the Actions cell.
icon in the Actions cell.
More Information
Forms are a broad topic outside the scope of this documentation. We highly recommend you read the FIVE Form Guide to learn all about forms.
Printing
The ![]() Print button appears in the view action bar near the top-left corner of the FIVE window:
Print button appears in the view action bar near the top-left corner of the FIVE window:
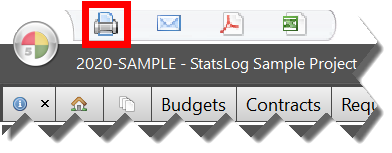
Figure 15 The Print button in the View Action Bar near the top-left corner of the FIVE window.
Click the ![]() Print button to open the Print Options window where you can select formatting options and send the active document to a printer.
Print button to open the Print Options window where you can select formatting options and send the active document to a printer.
Tip
The ![]() Print button is enabled when printing is supported by the current tab or page.
Print button is enabled when printing is supported by the current tab or page.
The ![]() Print button is disabled when printing is not supported by the current tab or page.
Print button is disabled when printing is not supported by the current tab or page.
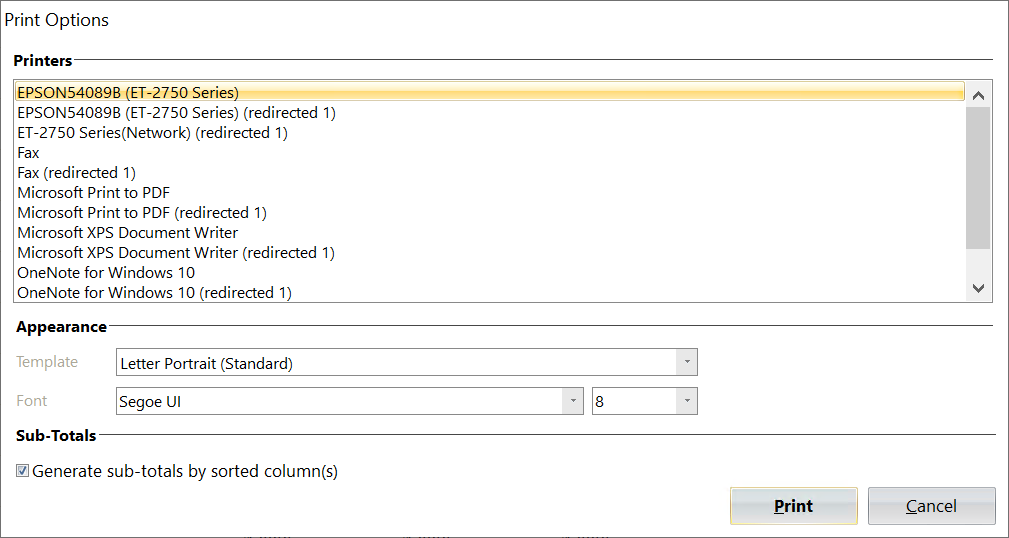
Figure 16 The Print Options window for reports.
Emailing
The ![]() Email button appears in the view action bar near the top-left corner of the FIVE window:
Email button appears in the view action bar near the top-left corner of the FIVE window:
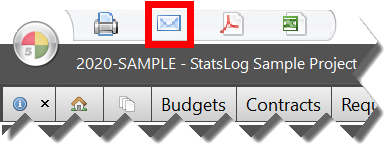
Figure 17 The Email button in the View Action Bar near the top-left corner of the FIVE window.
Click the ![]() Email button to show the Email Message window where you can select recipients, type a subject and message, and distribute a PDF of the information appearing in the view area of the current tab:
Email button to show the Email Message window where you can select recipients, type a subject and message, and distribute a PDF of the information appearing in the view area of the current tab:
Tip
The ![]() Email button is enabled when emailing is supported by the current tab or page.
Email button is enabled when emailing is supported by the current tab or page.
The ![]() Email button is disabled when emailing is not supported by the current tab or page.
Email button is disabled when emailing is not supported by the current tab or page.
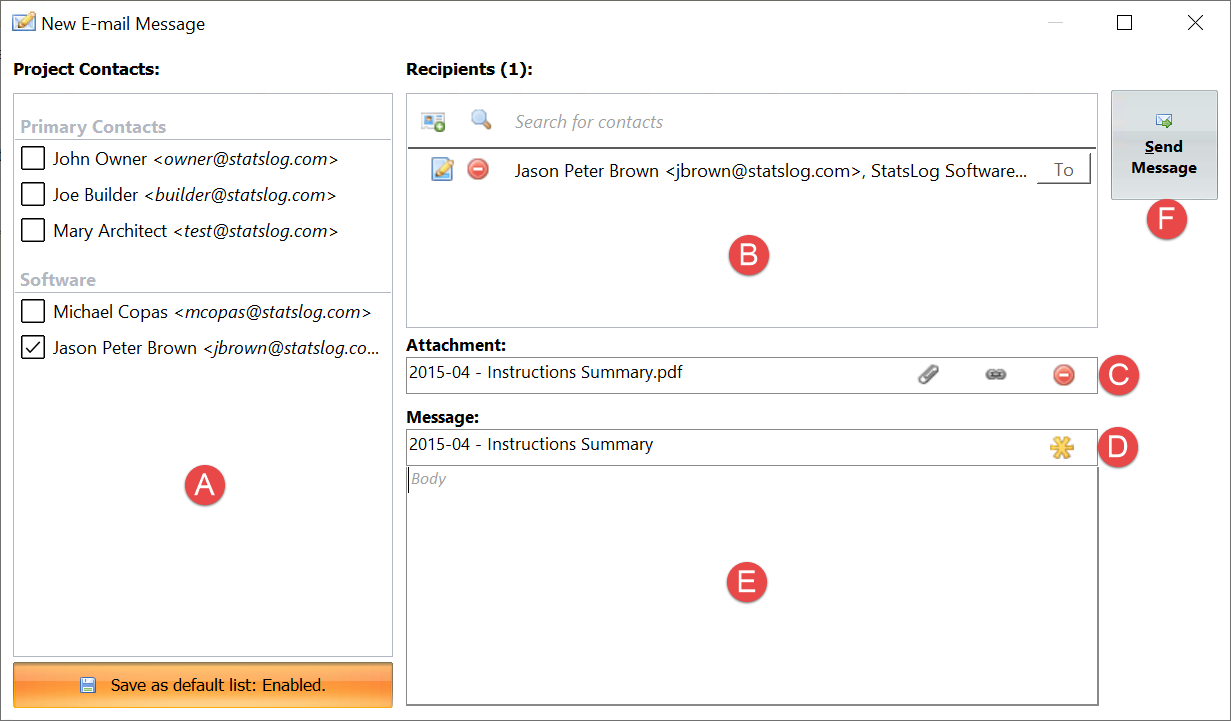
Figure 18 The New Email window.
The email window is composed of the following sections:
| A | Project Contact List | This list shows every contact related to the current project, making it easy to select the correct recipients, and reducing the chance of sending confidential information to the wrong contacts. |
| B | Recipients List | This list shows the recipients selected for the email. You can search the FIVE address book for contacts that are not already associated with the project, or add new contacts to the address book here. |
| C | Attachment | This box shows the name of the document that is attached for distribution. Click the Click the Click the |
| D | Subject | The “smart subject” feature automatically creates a subject here. You can change the automatic smart subject to anything you like. Click the |
| E | Message Body | Type your email message body here. |
| F | Send Button | Click this button to send the email message. Note If FIVE is configured to use the Microsoft Outlook message window before sending, clicking this button will not send the message right away. You must click the Send button in the Outlook window that appears to send the message. |
Exporting to PDF
The ![]() Export to PDF button appears in the view action bar near the top-left corner of the FIVE window:
Export to PDF button appears in the view action bar near the top-left corner of the FIVE window:
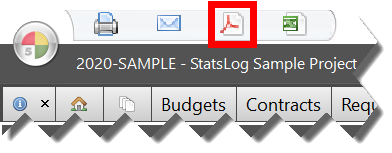
Figure 19 The Export to PDF button in the View Action Bar near the top-left corner of the FIVE window.
Click the ![]() Export to PDF button to show the Export Options window. The options that are available will depend on the type of active document view (for example, Report View and Form View have different options - see below).
Export to PDF button to show the Export Options window. The options that are available will depend on the type of active document view (for example, Report View and Form View have different options - see below).
Tip
The ![]() Export to PDF button is enabled when exporting is supported by the current tab or page.
Export to PDF button is enabled when exporting is supported by the current tab or page.
The ![]() Export to PDF button is disabled when exporting is not supported by the current tab or page.
Export to PDF button is disabled when exporting is not supported by the current tab or page.
Export Options for Reports
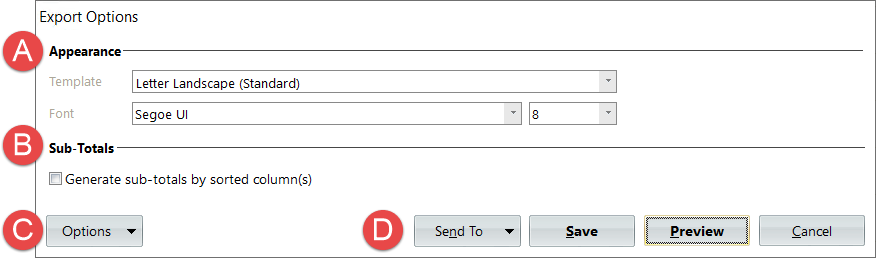
Figure 20 The Export Options window for reports.
| A | Appearance Options | Select the page size, font face, and font size for the exported report. |
| B | Sub-Total Options | Select whether or not to calculate sub-totals for the report. When this option is selected, sub-totals will be calculated by grouping sorted columns together. For example, if you sort your report by the Form Type column, and you have 2 form types (CAD and CO for example), then sub-totals will be calculated for all the CADs and all the COs. |
| C | More Options | Click this button to select other options, including securing/unsecuring the exported PDF file. |
| D | Export Methods | Click Send To to send the exported PDF to a smart folder, bluetooth device, or to any item that has already been logged in FIVE. For example, you can export a copy of the Progress Items report and attach it to the most recently issued Certificate. Click Save to save the exported PDF to a folder on your computer or network drive. Click Preview to open the PDF in your default PDF viewing application. Click Cancel to close the Export Options window without exporting the report to a PDF. |
Example of an Exported Report
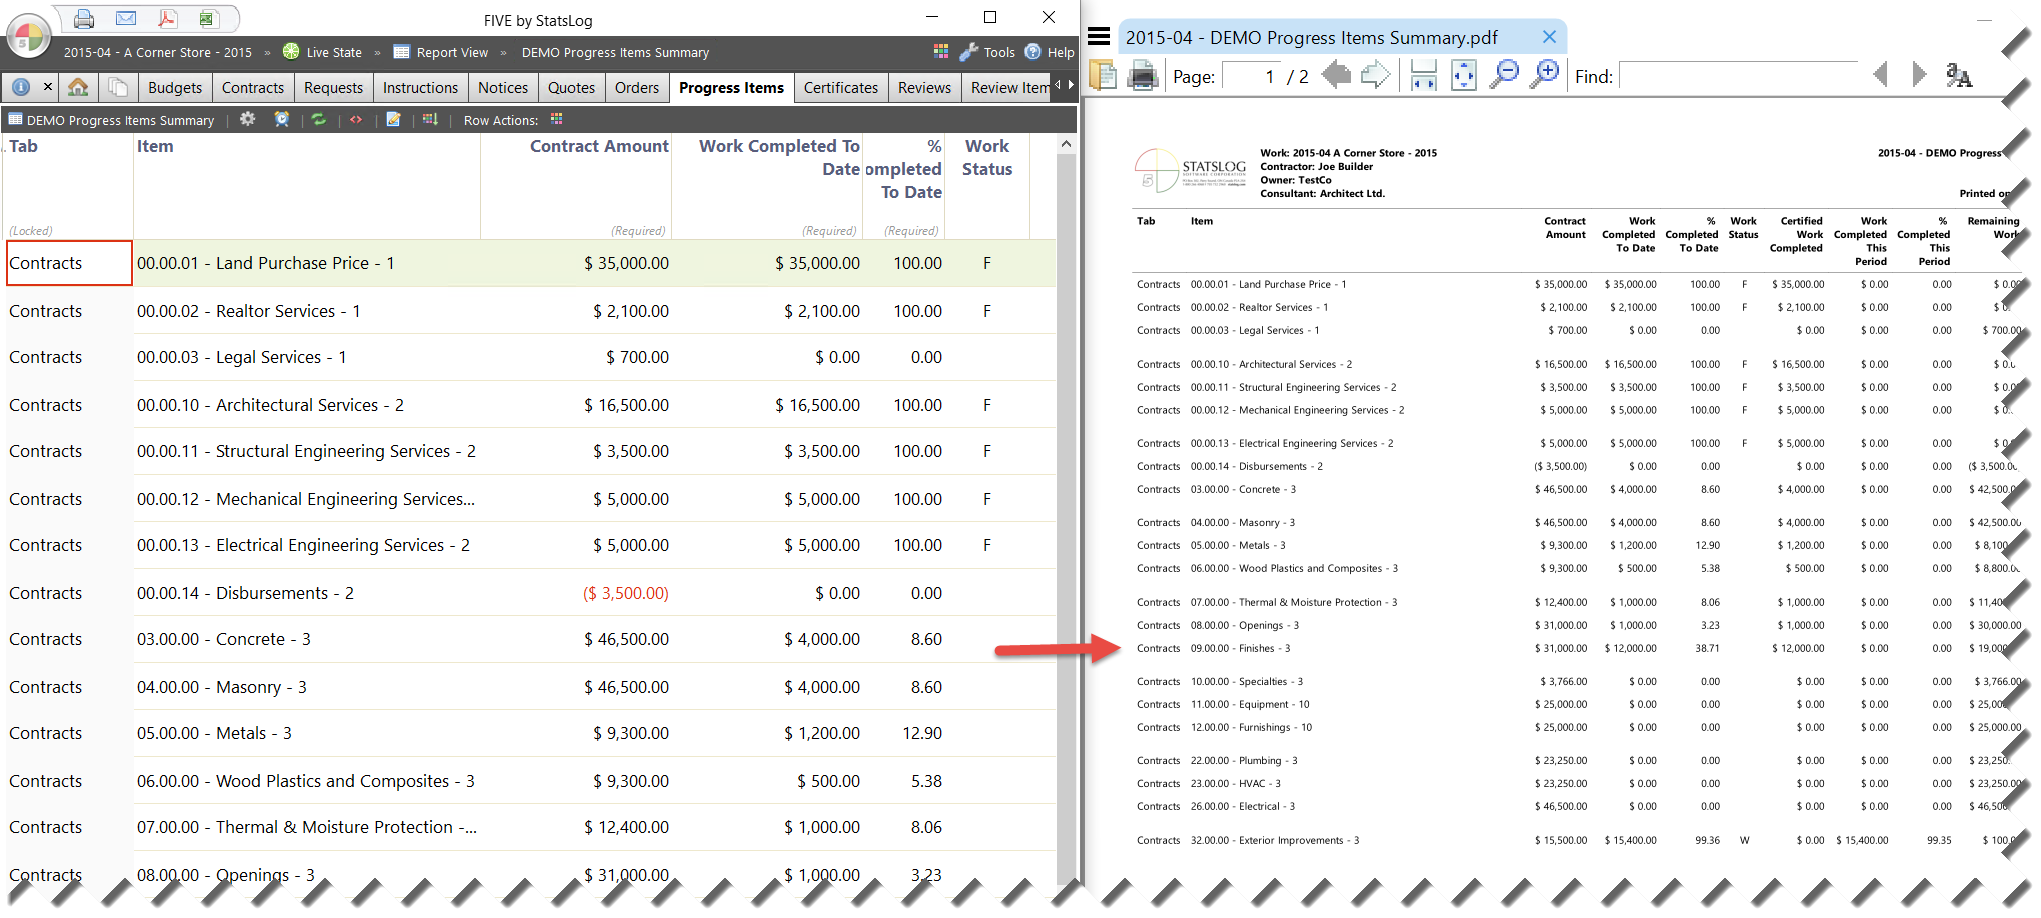
Figure 21 An example report exported to PDF. Notice that FIVE automatically added a header with your logo and project information, and the “smart formatting” feature resized the columns to fit the available page width.
Export Options for Forms
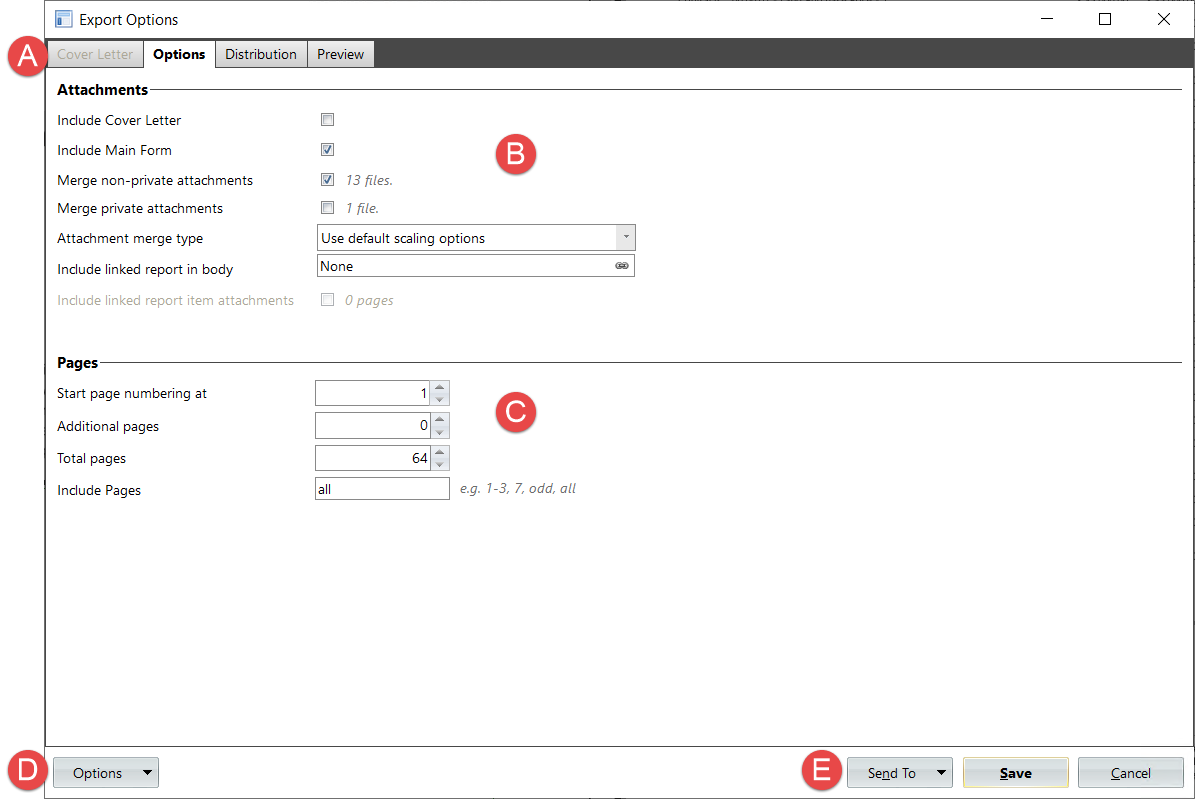
Figure 22 The Export Options window for forms.
| A | Tab Bar | The tab bar organizes all export options into categories.
|
||||||||||||||
| B | Attachment Options | In this section you can Configure the items that you want to appear in the exported PDF.
|
||||||||||||||
| C | Page Options | In this section you can configure page numbering and page ranges to include in the exported PDF.
|
||||||||||||||
| D | More Options | Click this button to select other options, including securing/unsecuring the exported PDF file. | ||||||||||||||
| E | Export Methods | Click Send To to send the exported PDF to a smart folder, bluetooth device, or to any item that has already been logged in FIVE. For example, you can export a copy of the Progress Items report and attach it to the most recently issued Certificate. Click Save to save the exported PDF to a folder on your computer or network drive. Click Cancel to close the Export Options window without exporting the report to a PDF. |
Exporting to Microsoft Excel
The ![]() Export to Microsoft Excel button appears in the view action bar near the top-left corner of the FIVE window:
Export to Microsoft Excel button appears in the view action bar near the top-left corner of the FIVE window:
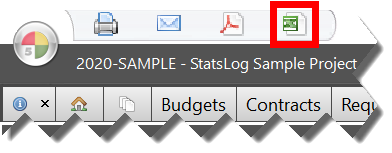
Figure 23 The Export to Microsoft Excel button in the View Action Bar near the top-left corner of the FIVE window.
When you click the ![]() Export to Microsoft Excel button, a spreadsheet will be created in a new Microsoft Excel window. The spreadsheet will include all the information that appears on the active view in FIVE.
Export to Microsoft Excel button, a spreadsheet will be created in a new Microsoft Excel window. The spreadsheet will include all the information that appears on the active view in FIVE.
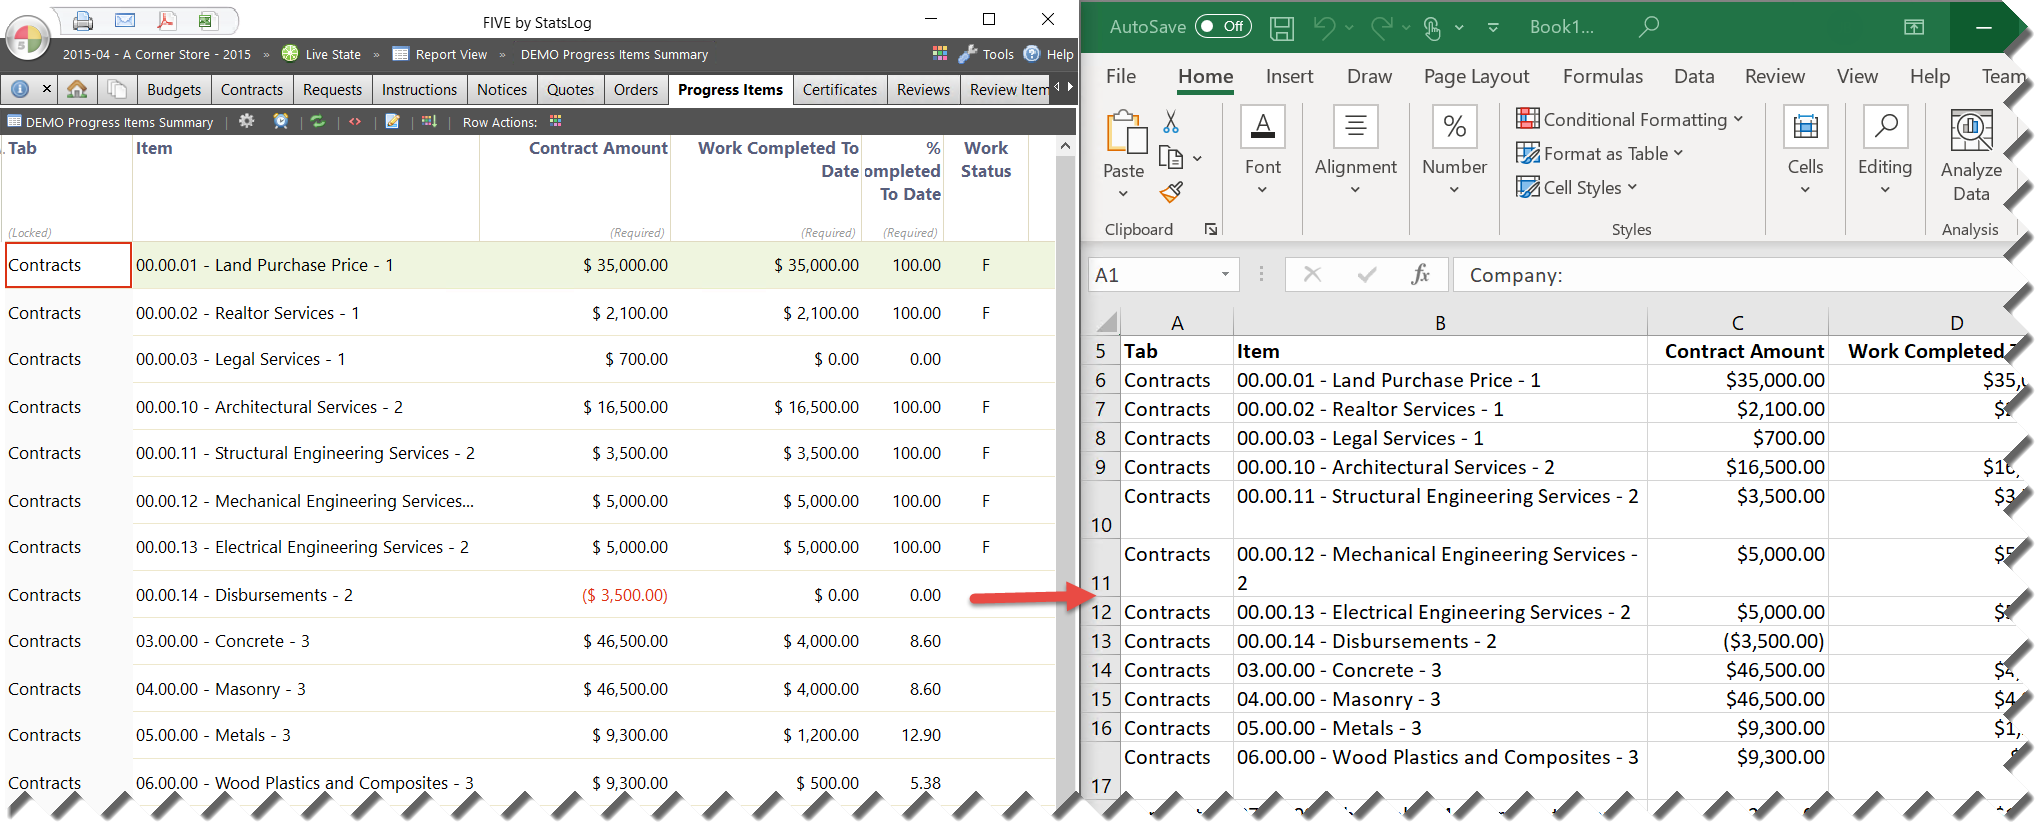
Figure 24 An example report exported to an Excel spreadsheet
Note
Microsoft Office/Excel must be installed on your computer to use this feature.
Tip
The ![]() Export to Microsoft Excel button is enabled when exporting is supported by the current tab or page.
Export to Microsoft Excel button is enabled when exporting is supported by the current tab or page.
The ![]() Export to Microsoft Excel button is disabled when exporting is not supported by the current tab or page.
Export to Microsoft Excel button is disabled when exporting is not supported by the current tab or page.
Attachments
Attachments are files that are linked to items that are logged in FIVE. For example, you can attach a contractor’s quote PDF to a change order, or attach site photos to a field review.
You can easily attach PDF and image files by dragging & dropping them onto any report row that supports attachments.
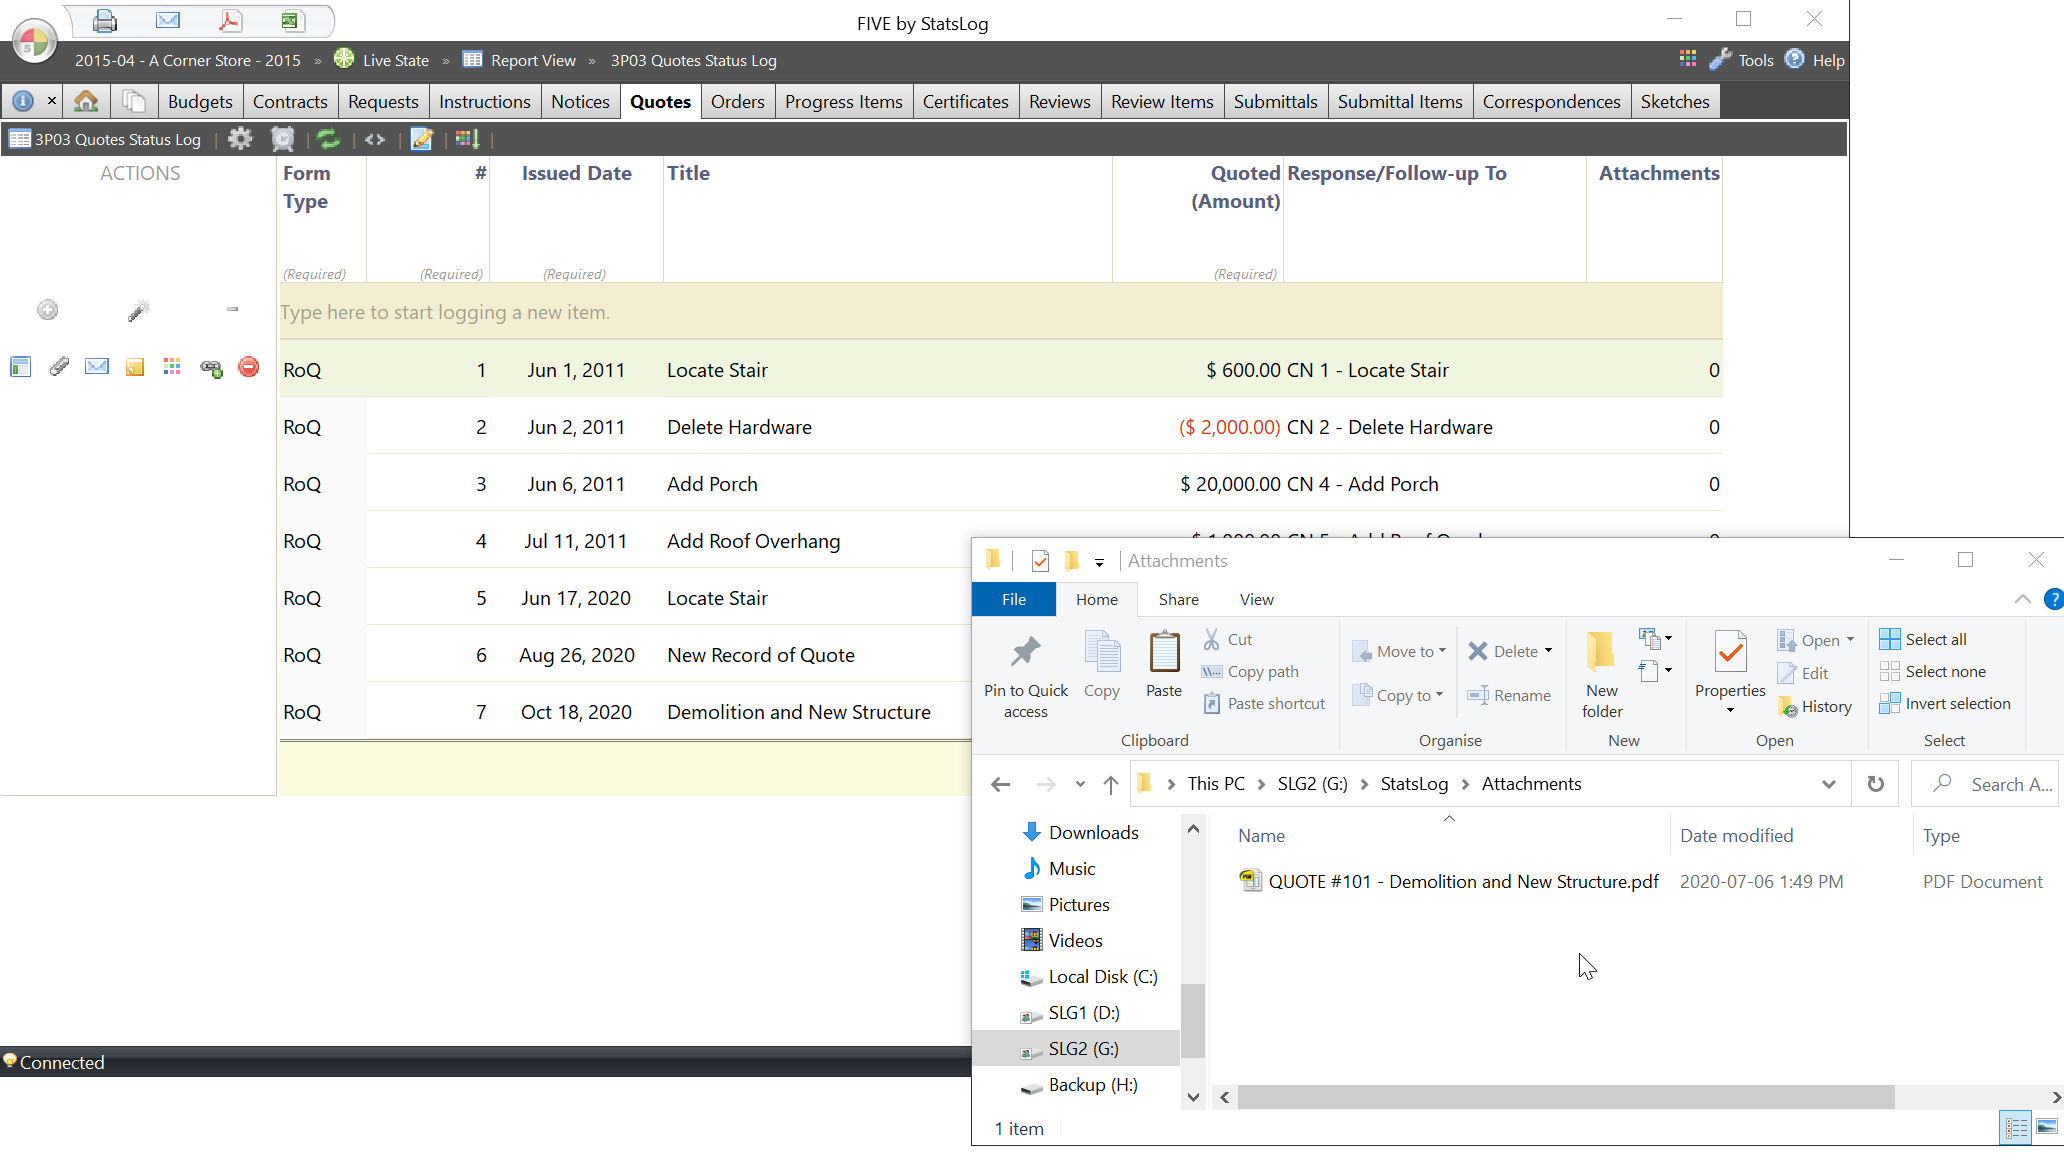
Figure 25 Dragging & Dropping a PDF file from Windows File Explorer onto a Quote in FIVE. The PDF will be uploaded to the FIVE server system where it will immediately become available to all users.
You can see the list of attachments for any item as follows:
- Select the row of the item.
- In the Actions cell, click the
 button. The Attachments report appears.
 - You can leave the attachment report and return to the main report by clicking the
 button that is just above the top-right corner of the attachment report.
Tip
When an item has attachments, the email icon will look like this: ![]()
When an item has no attachments, the icon will look like this: ![]()
You can see the attachment log for every item in the project at once on the PROJECT HOMEPAGE TAB > Attachments Page as follows:
- Go to the
 Project Homepage tab.
 - Click the Summaries button, then click the Attachments button. The attachment summary report appears.
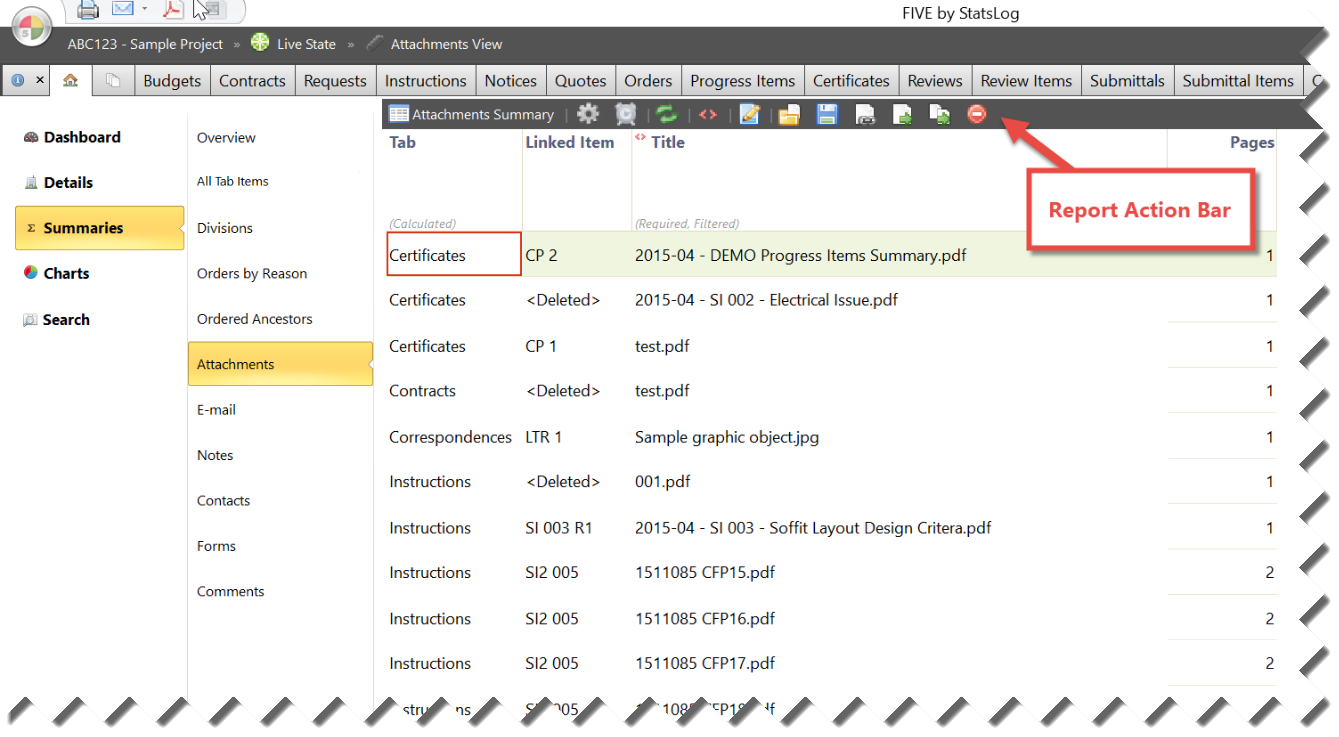
Figure 26 The Attachment Summary report.
Outgoing Email Logging
When you send an email message from FIVE (as described in the Emailing section), it will be automatically logged.
You can see the list of outgoing emails logged for any item as follows:
- Select the row of the item.
- In the Actions cell, click the
 button. The Email report appears.
 - You can leave the email report and return to the main report by clicking the button that is just above the top-right corner of the email report.
Tip
When an item has emails logged, the email icon will look like this: ![]()
When an item has no emails logged, the icon will look like this: ![]()
You can see the outgoing email log for every item in the project at once on the PROJECT HOMEPAGE TAB > Email Page as follows:
- Go to the Project Homepage tab.
- Click the Summaries button, then click the Email button. The email summary report appears.
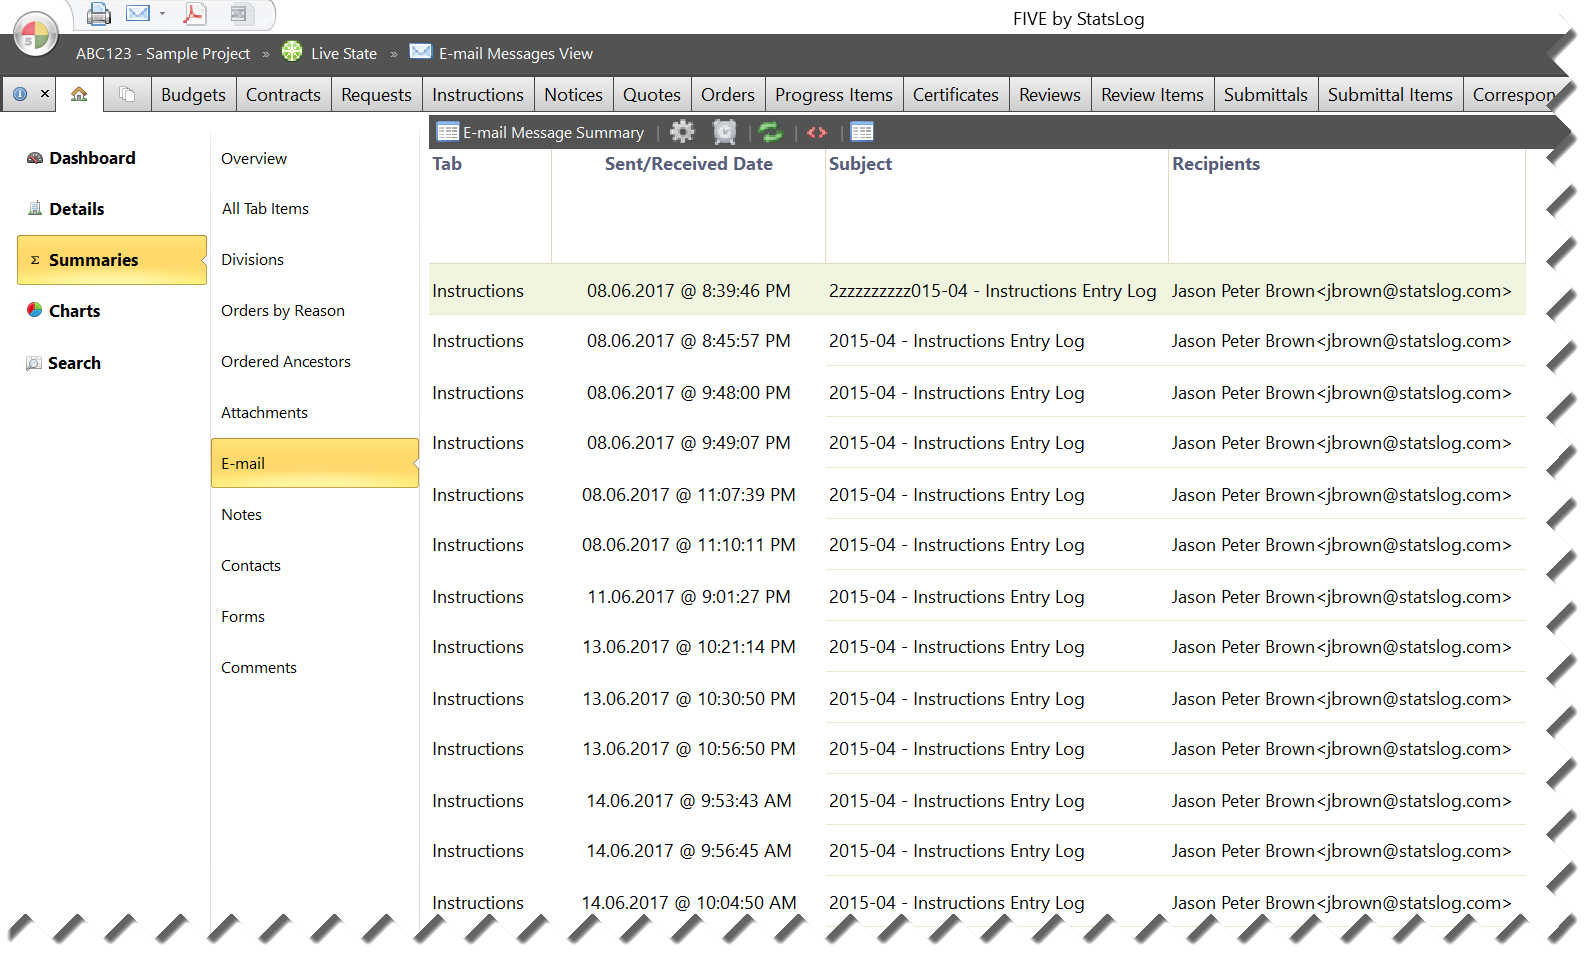
Figure 27 The Email Summary report.
Notes
Notes are used to record item-specific notes or comments. Notes are typically for internal use, but they can be shown on reports and forms if desired.
You can see or edit any item’s notes as follows:
- Select the row of the item.
- In the Actions cell, click the
 button. The Notes window appears.
Tip
When an item has notes, the notes icon will look like this: ![]()
When an item has no notes, the icon will look like this: ![]()
You can see the notes for every item in the project at once on the PROJECT HOMEPAGE TAB > Notes Page as follows:
- Go to the Project Homepage tab.
- Click the Summaries button, then click the Notes button. The notes summary report appears.
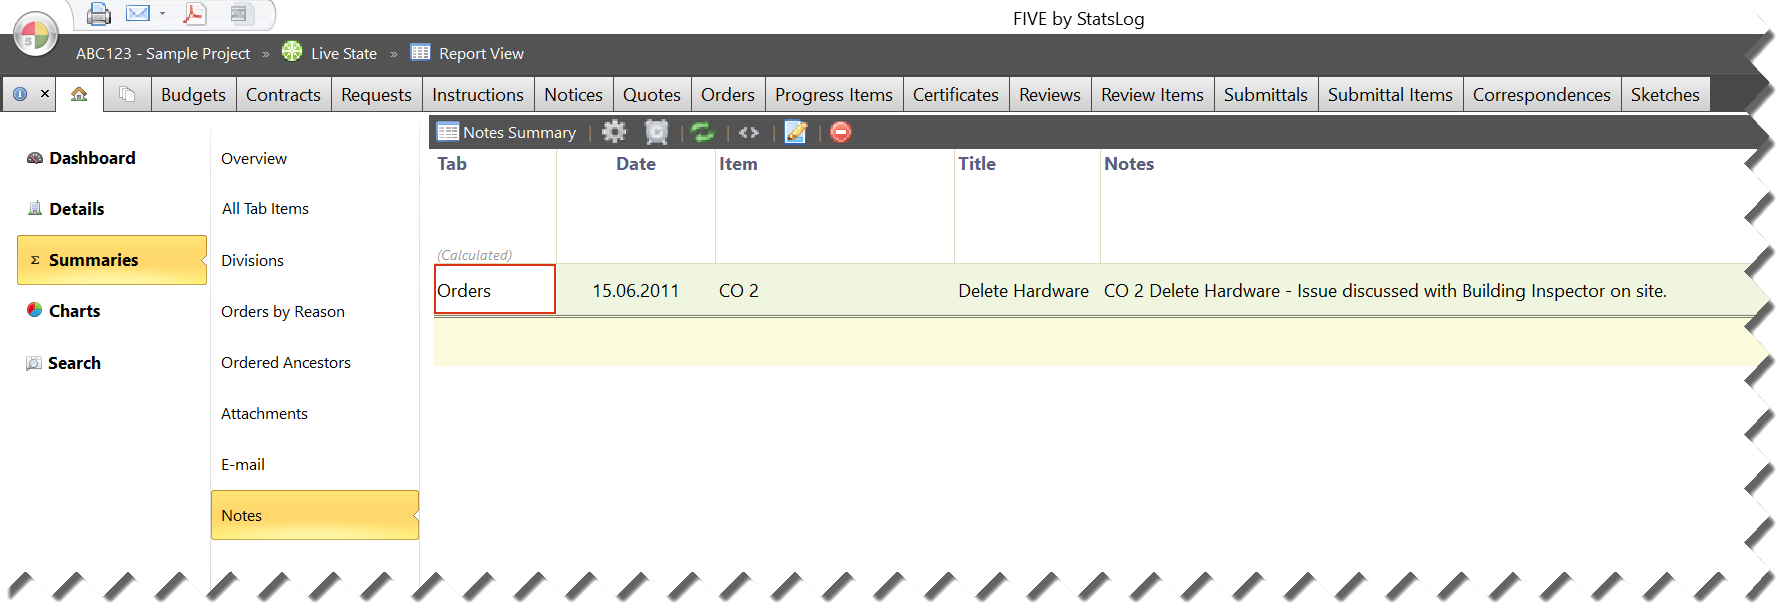
Figure 28 The Notes Summary report.
Row Highlighting
Row highlighting can help you identify important items by colour - for example, red for critical items, green for completed items, etc… The meanings of the colours are entirely up to you and your CCA team.
You can highlight any row as follows:
- Select the row you want to highlight.
- In the Actions cell, click
 .
. - Select the highlight colour that you want to use. The row’s background colour will change to the selected highlight colour.
Sorting by Row Highlight Colour
You can sort all of the rows on a report by their highlight colour by clicking the ![]() button in the report action bar.
button in the report action bar.
Document Linking
You can quickly create a new document that is linked to an existing document, for example a Change Order (CO) that is linked to a Contractor’s Quote. You can optionally attach a PDF of the linked document to the new document.
This feature makes it easy to discover the lineage of a document. For example, you can see how you got to a Change Order through an RFI, Site Instruction, Change Notice, and Quote - all without requiring any manual tracking or report building!
To create a new document linked to an existing document:
- Go to the tab of the existing document.
- Select the row of the existing document.
- In the Actions cell, click the
 button.
 - In the menu that appears, select the tab and document type that you want to create. You will be taken to the new item row of the selected tab and information such as the document type, number, and date will be filled in automatically.
- Update any other cells as required, then click the
 button to create the new document.
Drafts
Overview
You can issue drafts of some documents (e.g. Certificates for Payment/CFP) to preview automatically summed values before finalizing them for distribution.
Creating Drafts
To create a draft Certificate:
- Go to the tab where you want to issue a draft document.
- In the Actions cell on the new item row, click the
 button.
 - When prompted, select the type of draft document that you want to create (for example, select Certificate for Payment).
- In the Actions cell on new item row, click the button.
- When prompted, select the Create Draft item option. The draft Certificate will be created.
Tip
You can identify draft documents by the ![]() icon that appears beside the document row when it is not selected, and by the
icon that appears beside the document row when it is not selected, and by the ![]() button that appears in the Actions cell when the row is selected.
button that appears in the Actions cell when the row is selected.
Finalizing Drafts
You can finalize any draft as follows:
- Select the row of the draft.
- In the Actions cell of the selected row, click the
 button.
 - When prompted, select the Finalize option
More Information
For more information about drafts, see the Draft Certificates Guide.